How to Make | Forged Flint Striker
IF YOU HAVE A FORGE AT HOME…
These instructions below stem from back when we used to teach this at our forge in County Wicklow, so you may find that certain parts are not explained through and through. But if you have already done a little bit of blacksmithing I’d say you should be able to figure it out and make your own alterations to the ‘recipe’. Remember that small isn’t necessarily easy; size combined with the fact that the material used is carbon steel, means shaping is harder and it’s trickier to get sufficient heat in the correct area. (If you want to introduce your kids to the craft a flint striker wouldn’t be a good place to start!) We still run courses, you can sign up here.
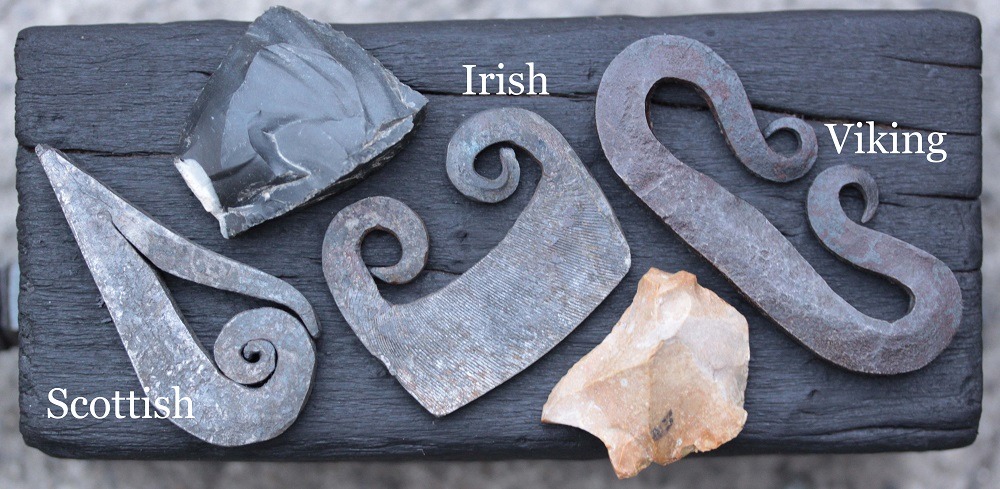
THE STRIKERS & THE FLINT
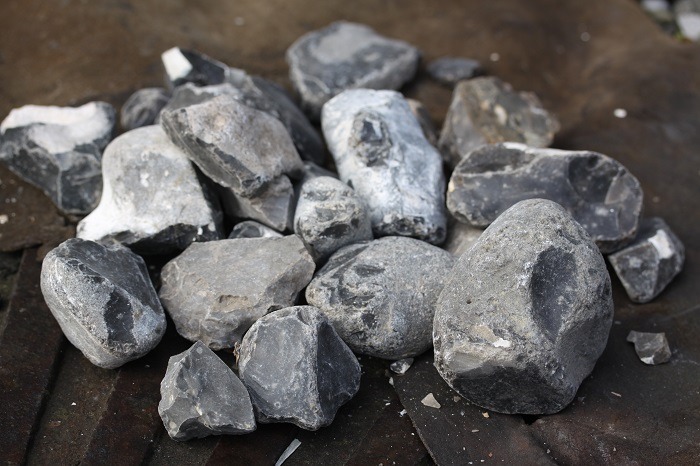
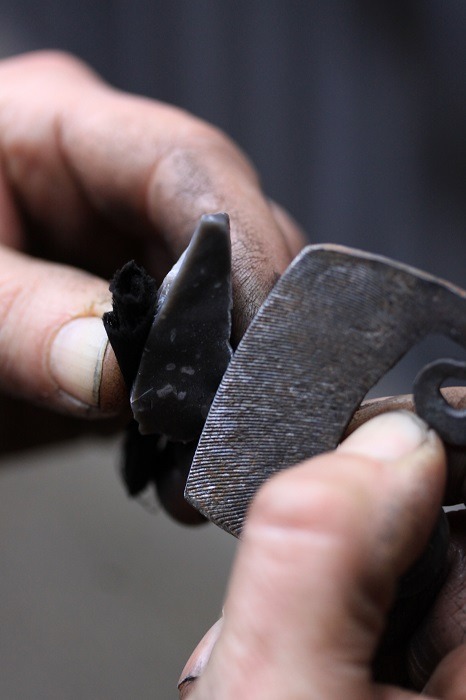
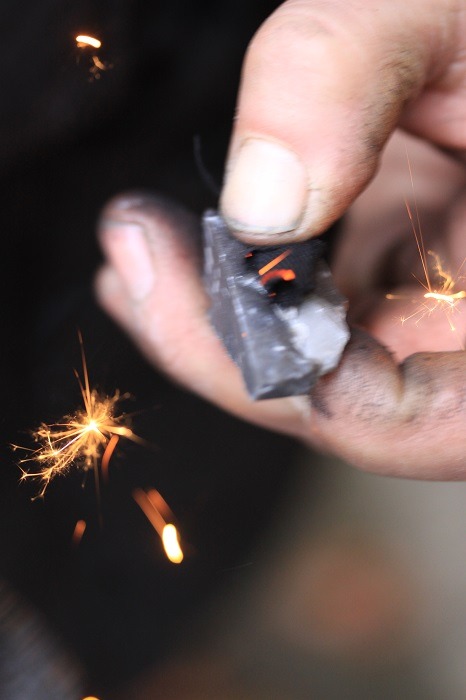
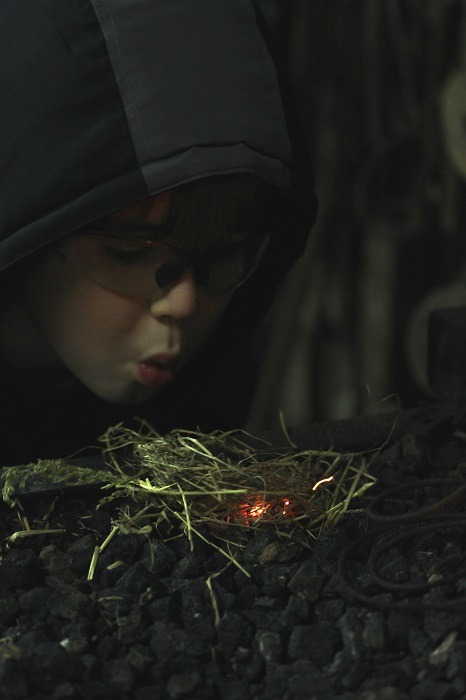
The flint striker designs are based on archaeological finds. From the Iron Age forward and prior to the invention of the friction match, the use of natural flint & steel was one of the most common methods of fire lighting. The flat side of the fire striker is struck at an acute angle against a sharp edge of a piece of flint. Direct the sparks onto char cloth or other flammable material which should be held directly under or over the flint. Flint strikers will ‘work forever’ so if the sparks stop coming – it’s time to collect some more flint! I am originally from Denmark, where flint is so plentiful that it’s literally used to pave (gravel) roads. In Ireland I believe the best places to find big flint nodules are the beaches along the north coast of Antrim (especially Ballycastle) and south Wexford (around Kilmore Quay). In the midlands you can find chert – which has a brown appearance – but although it has very similar properties to flint it isn’t as easy to use in my opinion. The main think you need to be aware of is that small found nodules aren’t any good as the edges have been softened over time. You will need rocks as big as possible as the first thing you will need to do is to pop on those safety specs and split the rock with a hammer. This will create shards with those razor-sharp edges you need to strike a spark. It’s not the flint itself that sparks, it’s the high pressure exerted on the steel which causes a small particle to peel off, meet oxygen and spontaneously combust. (this happens when you angle-grind metal too by the way!)
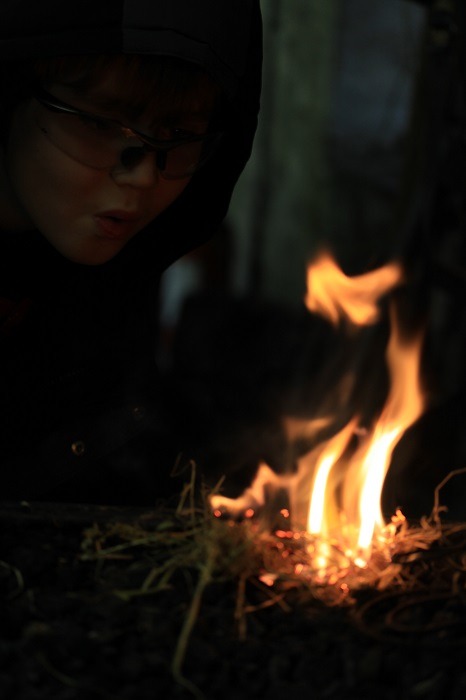
MAKING CHAR CLOTH
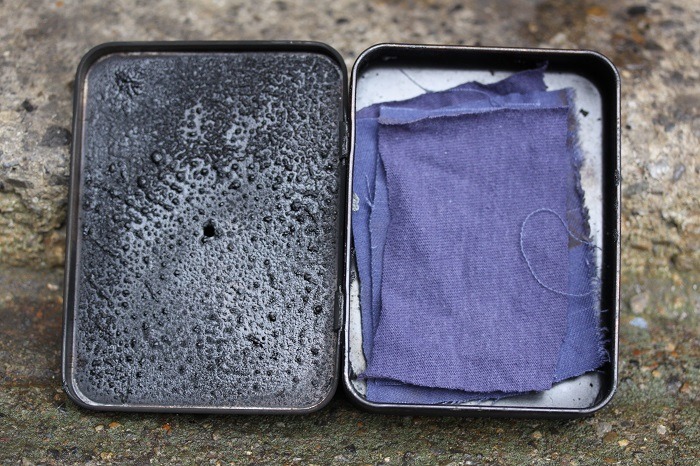
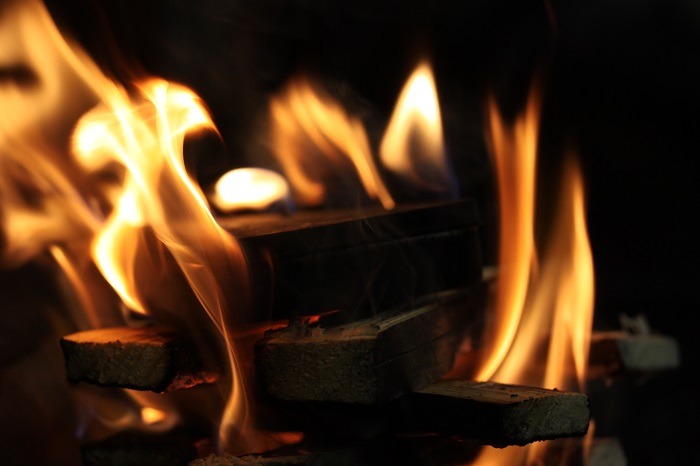
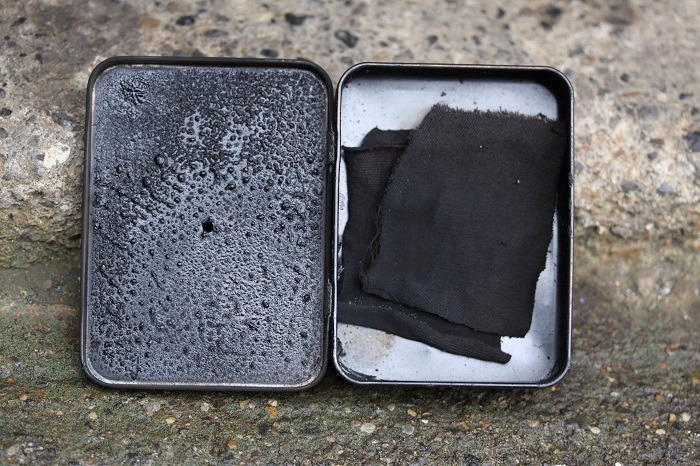
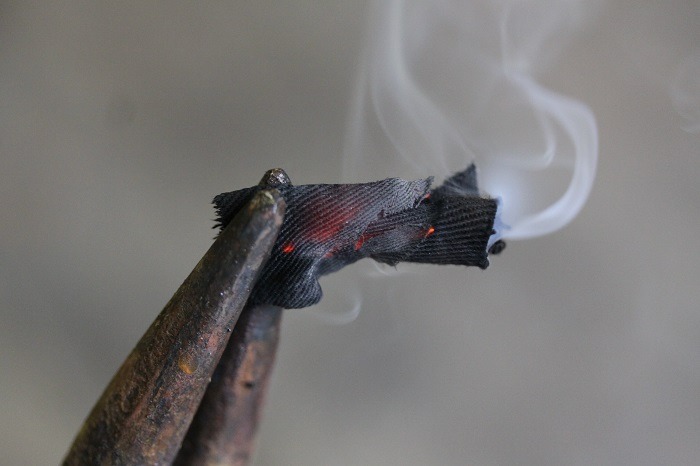
Get a small flat metal tin and drill a small hole in the top. This will allow smoke and pressure to escape without the oxygen burning the cloth completely. Cut small squares of 100% cotton or linen fabric (an old t-shirt or shirt is perfect) Place the tin on some hot coals and let it cook until the smoke subsides. Let it cool completely, and don’t open it for several hours (the cloth will catch flame and burn to a cinder)
THE OBJECTIVE
To retain a flat and smooth steel edge to strike the flint. To gain width, i.e. get your fingers on a distance of the sharp edge of the flint. To have a decorative object in your pocket to light the fire with! The three flint striker designs (Irish / Scottish / Viking) are sort of standardised… There would have been thousands of variations of same / similar / totally different shapes coming from different makers. This means of course that you ought to invent your very own trade-mark striker. And as you do this you can keep in mind your available material and making ability (i.e. make it easy for yourself for Gods sake!)
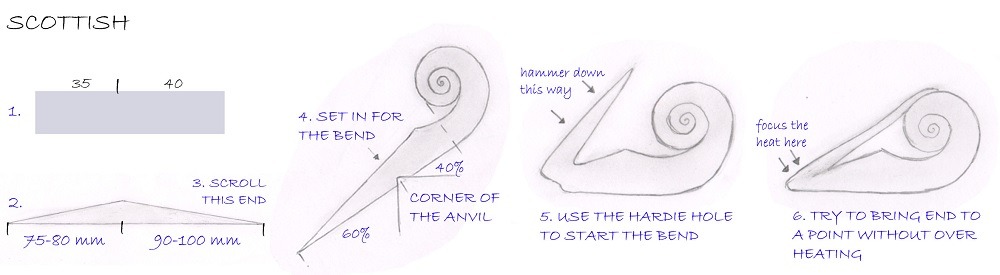
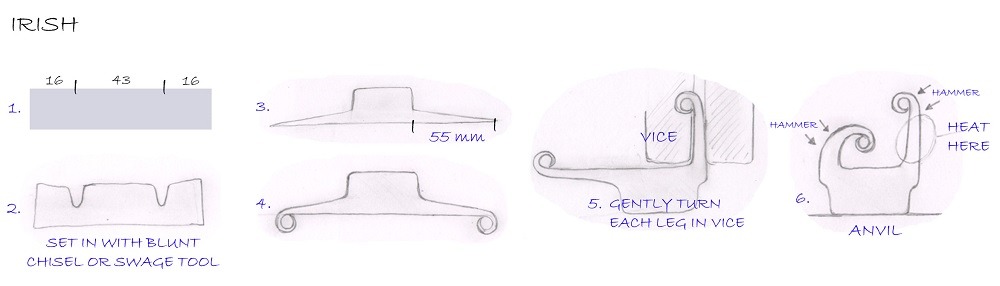
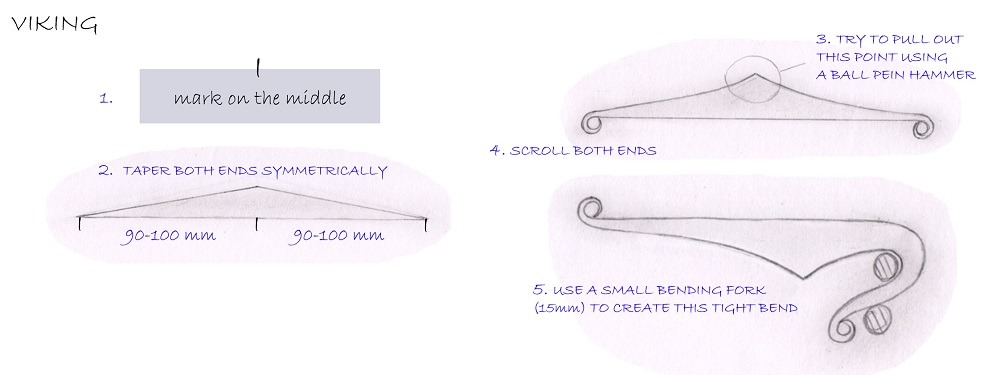
FORGING THE FLINT STRIKER
I use a starting material of 15mm of 75x6mm flat 01 tool steel (or an old file forged to same proportions) Round bar is no good – unless you hammer it into a flat rectangle first of course. Mark accordingly using the hardie or a chisel (a light mark will do)
THE HEAT TREATMENTS
Anneal after forging is complete and before hardening. Harden in water at a relatively high heat (bright orange) A flint striker is not tempered so avoid quenching the delicate scrolls and ‘arms’ of the strikers. Simply hold the edge of the striker in the water till you see the heat go from the upper more delicate parts. Your striker is ready!
DO’S AND DONT’S
The more carbon the lower the melting point – O1 tool steel will literally crumble if over-heated! Carbon steels can’t be quenched to localise the heat (like you do with mild steel) – so position in the fire is key. Use lots of re-heats. Don’t touch it with the hammer if its dull red or black as it might otherwise crack. Forging small objects like these require well -suited tongs which must be quenched regularly. Remember that a-symmetry really stands out so be accurate with your measurements. If the striker doesn’t work, try to lightly grind the edge (bottom /flat part of the striker) If you are used to using shop-bought ferrocerium rods – which easily creates a shower of much hotter sparks (3000 degrees as opposed 800) – you might not want to have your life depending on these old-school strikers as it ain’t that easy…
Further recommended reading on the art of fire-lighting: www.survivalsherpa.wordpress.com or www.theartofmanliness.com